
How to Choose LED Profiles for Cove and Indirect Lighting
Learn how to choose LED profiles for cove and indirect lighting: set the direction and setback, pick a frosted diffuser, and test the wash.
On This Page
For a cove or an indirect scheme, the right LED profile is the one that hides the source and washes the surface evenly. Start from the surface you want to light, not from the catalogue page. A profile that suits a high ceiling cove may fail in a low pelmet, and the reverse is also true.
This guide works through the five choices that decide the result. They are the light direction, the setback, the diffuser, the strip layout, and the dimming and colour temperature. It ends with a table that matches common cove types to a starting point, plus a checklist to run before you order. Use it to shortlist profiles, then confirm the final choice against the section drawing and a lit sample on site.
This guide covers ceiling coves, wall coves, pelmets, and other indirect details, and it treats each one as its own brief. It does not rank profiles against each other, because the right profile depends on the cove shape, the surface, and the viewing angle. Use it to shortlist, then confirm with a drawing and a sample.
01. How cove and indirect lighting works
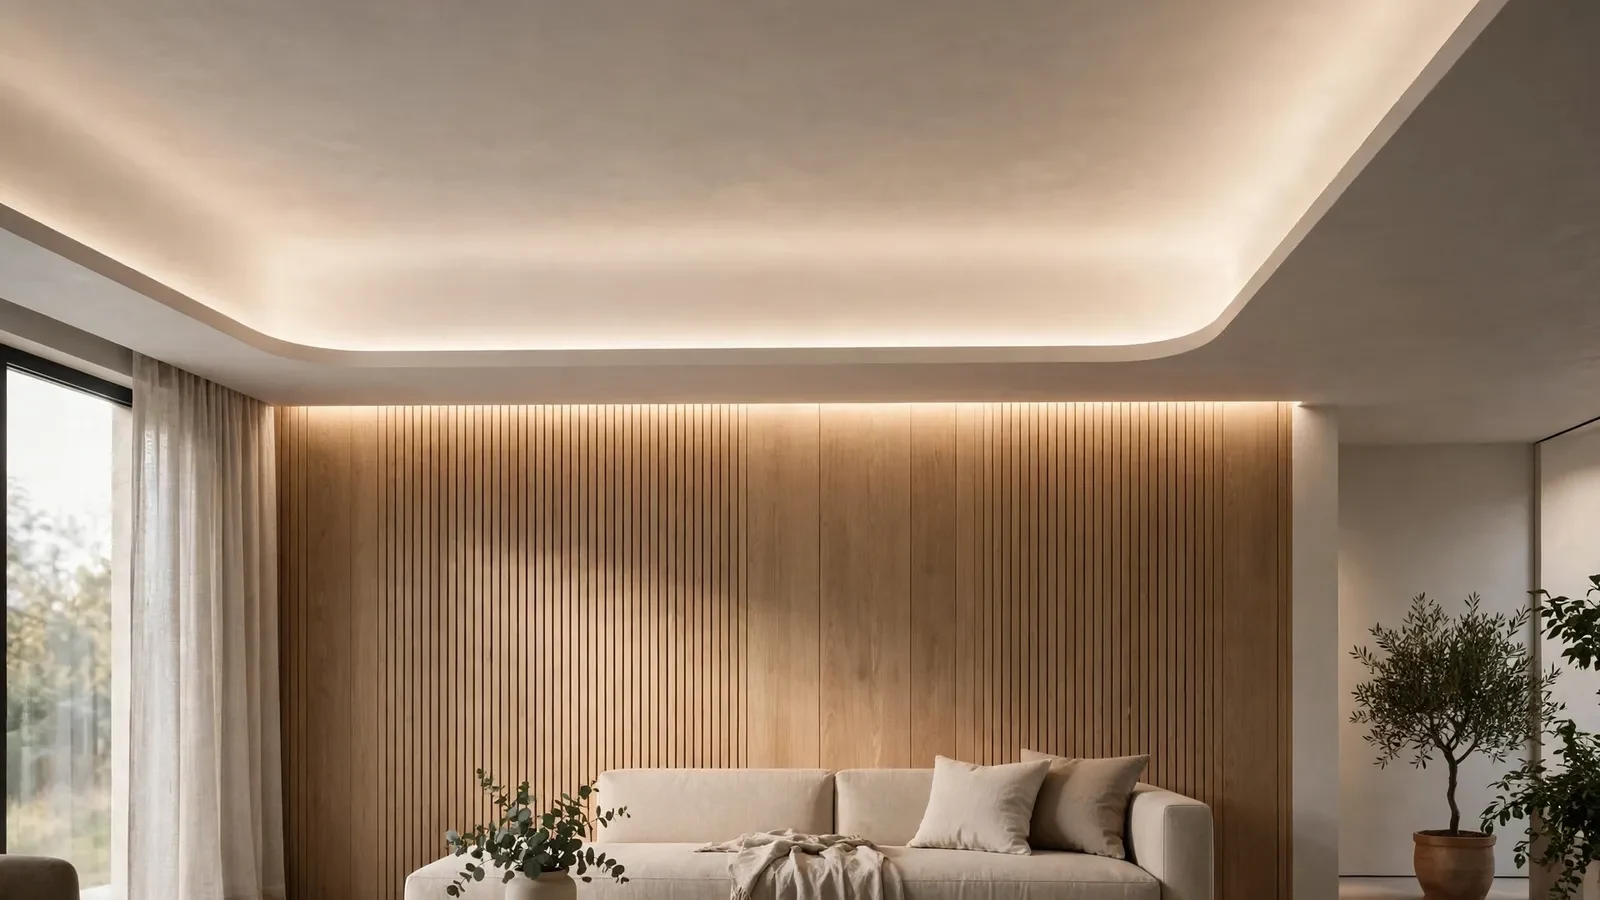
Indirect light bounces off a surface before it reaches the eye. The profile hides inside the cove, the strip shines onto the wall or the ceiling, and the surface itself becomes the light source. The result is a soft glow with no visible fitting, which suits living rooms, hotel lobbies, and retail ceilings.
The cove shape decides the effect more than the profile does. A deep cove with a high lip hides the strip from every angle, while a shallow cove can expose it to anyone standing nearby. Check the sightlines from the places people will actually stand, not just from the plan. A source that is hidden on paper can still show from a staircase or a mezzanine.
A cove is not a task light. It sets the mood of the room and lifts the ceiling, but it does not replace downlights over desks or counters. Plan the cove as ambient light, and pair it with task light where work happens. The corner LED profiles range suits wall-to-ceiling transitions, while a cove detail often needs a profile chosen for the cove shape itself.
02. Light direction and the wash effect
The profile angle sets where the wash lands. A strip aimed upward throws light across the ceiling and softens the room. A strip aimed at the wall draws the eye to the surface and its texture. Decide the direction per cove, not per project, because each surface deserves its own treatment.
A wall wash shows every flaw in the surface. A smooth plaster wall takes a wash well, while a rough or patched wall will show each bump as a shadow. Check the wall finish before you choose a wash angle, and correct the surface first if the wash will expose it. A cove that grazes a bad wall makes the wall look worse, not better.
A ceiling wash is more forgiving, but it still needs a clean surface. Stains, patches, and joints in the ceiling will show under a strong wash, so inspect the ceiling in raking light before you commit. If the ceiling cannot be made clean, use a softer wash or a lower output. Either hides more than a bright wash.
03. Setback: the distance from the surface
The setback is the gap between the profile and the surface it lights. A larger setback spreads the light over a wider area and softens the edge of the wash. A tight setback gives a sharper, brighter band close to the cove. The setback, the output, and the beam of the strip work together, so change one and the effect changes.
Test the setback with a sample on site, not with a drawing alone. Fix a short length at the planned setback and light it. Look at the wash from the places people will stand. Move it in small steps until the wash looks even from edge to edge. A sample test takes an hour, while a wrong setback costs a rebuild.
Keep the setback consistent along the whole run. A cove that drifts closer to the wall at one end will show a bright patch there and a dull patch at the other. Check the cove depth and the profile position at several points along the run, and correct the framing before the profile goes in. Consistency is what makes a wash look intentional.
04. The diffuser and a dot-free line
The diffuser decides whether the wash is smooth or striped. A frosted or opal diffuser blends the light from each LED point into one even wash. A clear cover can show stripes on the surface, even when the strip itself is hidden. For cove work, the frosted option is the usual starting point.
Strip density works with the diffuser, not instead of it. A dense strip with a shallow channel can still show dots if the diffuser sits too close to the strip. A deeper channel gives the light room to blend. Check the channel depth on the section drawing, and judge the lit sample on the real surface. The surface is the test, not the bench.
Dust in the cove will show in the wash over time. A cove that is open at the top collects dust on the strip and the diffuser, and the wash dulls unevenly. Plan access for cleaning when you plan the cove, and fit a diffuser that can be removed and wiped. A cove without cleaning access is a cove that fades.
05. Uniformity, dimming, and colour temperature
Uniformity is the test of a cove. Walk the room and look at the wash from end to end. Check for bright patches at joints, dark gaps at corners, and stripes from the strip. Most faults come from the layout, not the profile. The cause is often a joint in the wrong place, a strip that ends short, or a feed that drops the output at one end. Fix the layout before you blame the fitting.
Corners deserve their own check. A cove that turns a corner needs the strip and the diffuser to follow the turn without a gap. Without that, the corner reads as a dark break in the line. Mitre the profile or use a corner piece made for the section, and test the lit corner before the full run is ordered. A clean corner is what makes the cove look built in.
Dimming and colour temperature set the mood of the wash. A cove that dims smoothly can shift from bright welcome to quiet evening. A cove that steps or flickers will distract at low levels. Choose the colour temperature with the room in mind, and check the dimmed sample at the lowest level you plan to use. The suspended LED profiles range can pair with a cove in open rooms, but each zone still needs its own dimming check.
06. Cove-to-profile starting table
Use this table as a starting point, not a final specification. Each row names a common cove type, the approach that usually suits it, and the detail to watch. Confirm every row against the section drawing and a lit sample before you order.
| Cove type | Usual starting point | Detail to watch |
|---|---|---|
| Ceiling perimeter cove | Hidden profile, upward wash | Sightlines from stairs and mezzanine |
| Wall cove | Profile aimed at the wall | Wall finish under a grazing wash |
| Pelmet over curtains | Hidden profile, downward wash | Setback from the curtain line |
| Curved cove | Bendable profile, frosted diffuser | Even wash around the bend |
| Retail ceiling cove | Hidden profile, dimmable strip | Uniformity across long runs |
When no standard section fits the cove, a custom profile can close the gap. Share the drawing, the cove shape, and the strip data with the supplier. Agree the section, the finish, and the component list before production. Custom work suits repeat ranges and unusual coves, but it needs the same checks as a standard section.
Two cautions apply to the whole table. First, the sightlines and the surface can overrule the usual choice, so treat each row as a prompt for the site check. Second, the setback matters as much as the profile, so judge the lit sample at the planned setback, from the real viewing positions.
07. Selection checklist
Run through this list with your cove notes, your strip data, and your section drawing in hand. Every item should have an answer before the order goes out. Any item without an answer is a question for the supplier or the installer.
- Cove shape and sightlines checked from real positions
- Light direction set per cove, not per project
- Setback tested with a lit sample on site
- Diffuser chosen for a smooth, dot-free wash
- Strip layout planned through corners and joints
- Wall and ceiling surfaces checked under a wash
- Dimming and colour temperature checked at low level
- Cleaning access planned for the cove
With the cove notes, the strip data, and this checklist, you can compare profiles on wash, uniformity, and access. That beats guessing from catalogue photos. That comparison is what keeps a cove detail from turning into rework. Keep the notes and the drawing with the order, so a later reorder starts from the same facts.
Frequently asked questions
What is cove lighting?
Cove lighting hides the LED profile inside a recess, so the light bounces off the wall or ceiling instead of shining straight at the eye. The surface becomes the light source, and the room gets a soft, even glow with no visible fitting.
How do I stop the cove wash from showing stripes?
Use a frosted diffuser with a channel deep enough for the light to blend, and check the lit sample on the real surface. Stripes usually come from a clear cover or a diffuser that sits too close to the strip.
How far should the profile sit from the wall?
There is no single distance, because the setback works with the strip output and the cove shape. Test a short length at the planned setback on site, and move it in small steps until the wash looks even from edge to edge.
Can a cove light a whole room on its own?
Usually not. A cove sets the ambient mood and lifts the ceiling, but task areas still need their own light. Pair the cove with downlights or task lines where people read, work, or display goods.
Why is the wash brighter at one end of the cove?
A bright end usually comes from the layout, not the profile: a joint in the wrong place, a strip that ends short, or a feed that drops output at one end. Check the layout and the feed route before you change the profile.

Share this guide
Tell us what you need
Send Your Project Requirements
Share your contact details and tell us which LED profiles you need.
Explore custom profile options