
How to Install LED Strip Lights with Aluminum Channel
Follow a step-by-step guide to installing LED strip lights in an aluminum channel: measure, cut, fit, wire, test, close, and mount.
On This Page
Installing a strip into an aluminum channel follows a simple order: measure, cut, fit, wire, test, close, and mount. The order matters, because a step done late can force you to undo an earlier one. Test the strip before you fit the diffuser, and fit the diffuser before you mount the channel in a tight spot.
This guide works through each step in order, with the tools and parts each step needs. It ends with a step table and a troubleshooting list for the faults that show up most often. Use it for surface, recessed, and suspended channels, and adapt the fixing step to the mounting style you chose.
This guide covers the channel and strip assembly only. It does not replace the instructions for your strip, your driver, or your finished luminaire. Mains wiring must follow local rules and the maker's instructions. When a step touches mains power, use a qualified person.
01. Before you start: measure and plan
Measure the run first, then cut nothing until the plan is complete. Note the total length, the position of each joint, and the point where power enters the run. Note the driver position, the cable route, and the access you need for later service. A plan made on paper prevents a channel cut short on the bench.
Check the strip against the channel before you cut either one. Compare the strip width with the usable internal width on the section drawing, and check that the connectors fit in the same space. Check the cable route out of the channel, and confirm that the end caps allow the cable to exit. A strip that fits alone can still fail once its connectors are added.
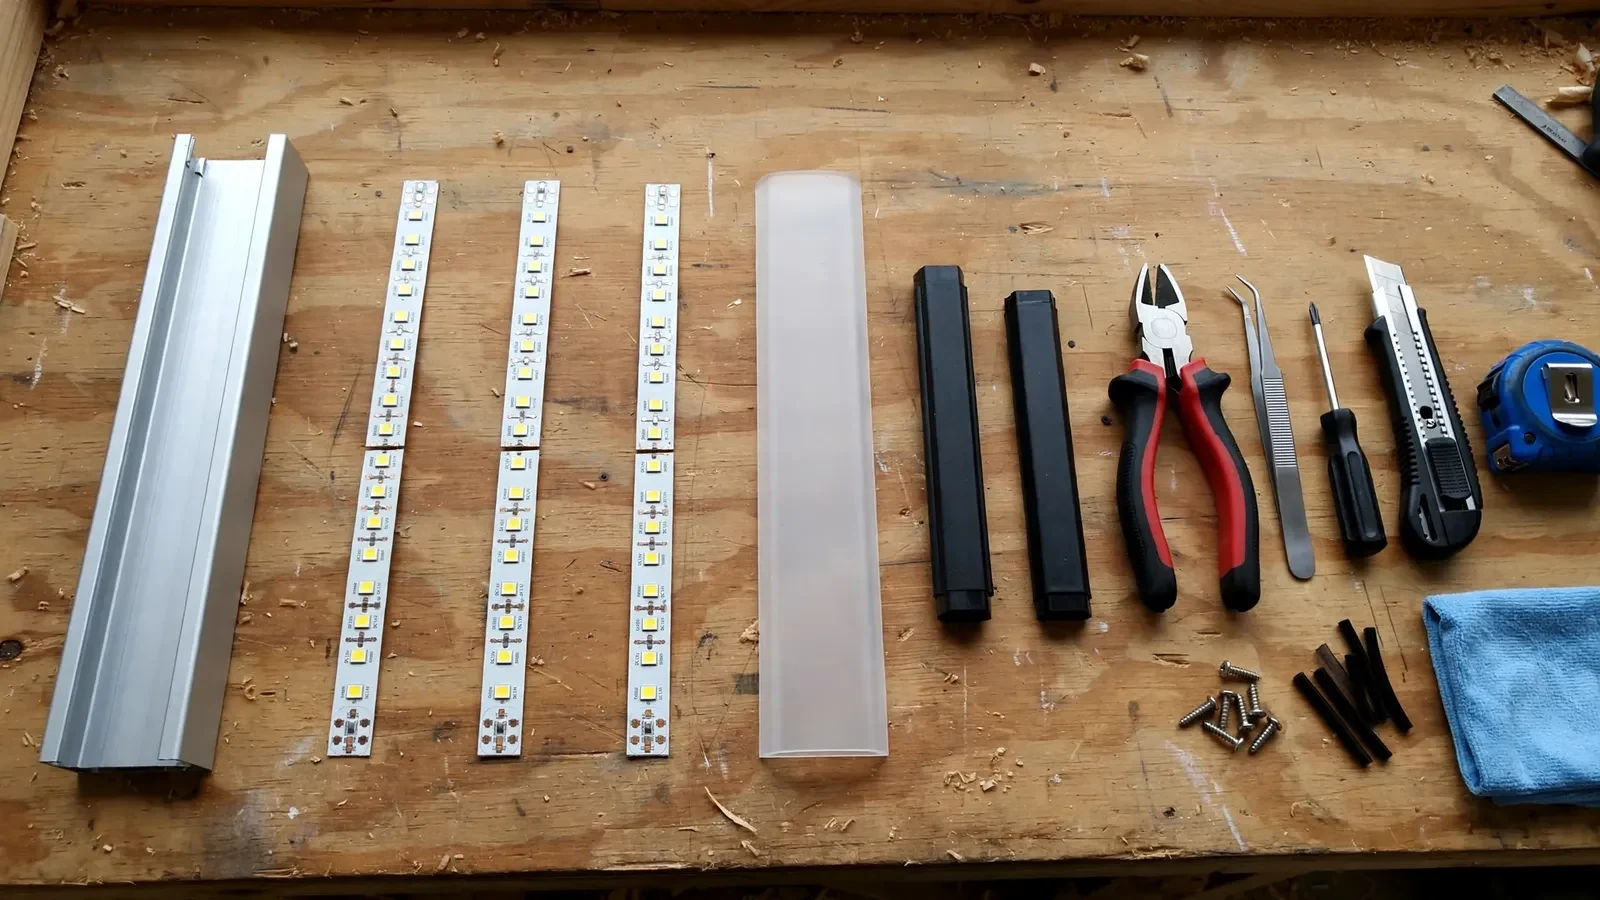
Gather the parts for the whole run before you start. Count the channels, the diffusers, the end caps, the clips, and the connectors per run end, not per run. A run has two ends, and a shortfall in a small part stops the job just as firmly as a wrong channel. Lay the parts out in step order on the bench.
02. Cut the channel and the strip
Remove the diffuser before you cut the channel, so the saw cannot score or crack it. Mark the cut line with tape, which keeps the mark visible and reduces burrs at the edge. Cut with a fine-toothed saw, keep the cut square, and file the edge smooth. A rough edge can damage the strip, snag the diffuser, or leave a visible flaw at the joint.
Cut the strip only at its marked cut points, and cut it slightly shorter than the channel. The strip needs room for its connectors and for the end caps at each end. A strip cut flush to the channel ends leaves no room for connections, and a strip cut between marks will not light past the cut. Check the marks under good light before you cut.
Clean both parts after cutting. Brush the aluminum dust out of the channel, and wipe the inner base where the strip will sit. Dust under the adhesive weakens the bond, and a loose strip sags, lifts, or shows uneven light. A clean, dry base is the cheapest insurance in the whole job.
03. Fit the strip into the channel
Center the strip in the channel, with equal space on both sides where the design allows it. Peel the adhesive backing a short length at a time, working from one end to the other. Press the strip down firmly as you go, and avoid stretching it or letting it twist. Air pockets and raised sections show up later as uneven light.
Handle the strip by its edges, and keep fingers off the adhesive side. Skin oil weakens the bond, and a strip that lifts at one end often lifts further once the diffuser is fitted. If the strip has a thick coating or a wide connector, check that both sit flat before you move on. A raised connector can stop the diffuser from closing.
For recessed and suspended channels, the same fitting rules apply, but the order may change. Some installers fit the strip before fixing the channel, while others fix the channel first and fit the strip after. Either order works, as long as the strip sits flat, the cables reach the feed point, and the diffuser can still be fitted. Choose the order that suits the access you have.
04. Wire and test before closing
Connect the strip to its power feed with the connectors or solder joints the strip maker specifies. Keep the joints inside the channel or in the planned cable route, and leave no bare conductor exposed. Check the polarity and the voltage against the strip and driver instructions before you power the run. A wrong connection can damage the strip at once.
Power the run and test it before you fit the diffuser. Check that the whole length lights evenly, that no section stays dark, and that the color looks consistent along the run. Testing now is easy, because every part is still open and reachable. Testing after the diffuser is fitted means opening the assembly again when a fault appears.
Fix any fault before you close the channel. A dark section usually points to a connection, a cut, or a feed problem. Each one is quick to reach while the channel is open. Note the fault and the fix on the job record, so a later service visit starts from facts instead of guesses. Do not close a channel over a known fault.
05. Fit the diffuser and end caps
Fit the diffuser from one end of the channel, pressing it into the holding grooves as you move along. Work steadily to the other end, and listen for the click that tells you the cover sits in place. A diffuser fitted unevenly can bow, gap, or pop out later, so check the full length by eye and by touch before you move on.
Cut the diffuser to match the channel length, measuring between the end caps rather than guessing from the channel alone. A diffuser cut long will not sit flat, and one cut short leaves a gap that shows the strip. Use a fine-toothed saw or snips, and clean the cut edge so it does not snag the groove.
Fit the end caps last in this step, with the cable exits where the plan puts them. Some caps have holes for cables, and some runs join through holed caps to the next section. Confirm that each cap matches the channel model, because caps are model-specific and a wrong cap will not seat. A seated cap finishes the run and protects the strip ends.
06. Mount the channel
Mark the fixing positions with a level before you drill or screw anything. A line that starts level stays level, while a line fixed by eye drifts visibly over a long run. Surface mount profiles fix onto the surface with clips or screws, and the fixing spacing should follow the maker's instructions for the section. Do not guess the spacing from another product.
Recessed profiles need a groove of the right width and depth, prepared before the channel goes in. Suspended profiles need fixing points in the ceiling structure and a planned cable route, not just a decorative ceiling. The mounting style decides the fixing step, so follow the detail for the section you chose.
Check the finished line before you call the job done. View it from the normal viewing position, and look for dips, gaps, bright spots, and dark ends. Check that every diffuser sits fully, every cap is seated, and every joint reads as one line. A final walk-past catches the faults that a bench test cannot show.
07. Step, tool, and mistake table
Use this table to check each step before you move to the next one. Each row names the step, the tool or part it needs, and the mistake that most often follows when the step is rushed.
| Step | Tool or part needed | Common mistake |
|---|---|---|
| Measure and plan | Tape, level, job drawing | Channel cut short, feed point forgotten |
| Cut channel and strip | Fine-toothed saw, file, tape | Strip cut between marks, rough edge |
| Fit the strip | Clean cloth, steady hand | Dust under adhesive, strip off-center |
| Wire and test | Connectors, driver, instructions | Closing over an untested fault |
| Fit diffuser and caps | Snips or saw, model caps | Diffuser cut long, wrong cap model |
| Mount the channel | Level, drill, clips or screws | Line fixed unlevel, spacing guessed |
Heat deserves a note of its own in this table. A channel helps the strip shed heat, but the result depends on the strip, the mounting interface, and the surrounding construction. Our heat management guide explains the thermal path in detail. For the diffuser choice, remember that the cover and the channel depth together decide whether dots show.
Two cautions apply to the whole table. First, the instructions for your strip and driver overrule any general step here when they differ. Second, a step skipped to save time usually returns as rework, so treat the table as a gate, not a suggestion.
08. Troubleshooting checklist
Work through this list when the finished line does not look right. Check the easy causes first, and change one thing at a time so the fix stays traceable. A careful check now saves a second visit later, and it keeps the job record clean.
- Dark section: check the connection, the cut point, and the feed
- Strip lifting: check dust, oil, and adhesive contact along the base
- Dots showing: check diffuser type, channel depth, and viewing distance
- Diffuser popping out: check the fit, the length, and the groove
- Uneven color: check the strip batch, the feed position, and the run length
- Dim ends: check the feed arrangement and the connector seating
- Flicker: check the driver, the connections, and the dimmer setting
- Line unlevel: check the fixing marks and the clip spacing
When a fault resists the list, stop and review the assembly instead of changing several parts at once. Reopen the diffuser, check the strip seating and the connections, and test the run open before you close it again. A fault found open is a fault fixed once, while a fault chased blind tends to return.
Frequently asked questions
Do I cut the strip or the channel first?
Cut the channel to the run length first, then cut the strip slightly shorter at its marked cut points. The strip needs room for connectors and end caps, so it should never run flush to the channel ends.
Can I cut an LED strip anywhere?
No. Cut only at the marked cut points on the strip. A cut between marks breaks the circuit past the cut, and that section will not light.
Why test before fitting the diffuser?
Testing open lets you reach every connection and section while faults are still easy to fix. Once the diffuser is fitted, the same fault means opening the assembly again.
What if the strip keeps lifting off the channel base?
Check for dust, oil, and moisture on the base, and check that the strip sits flat without stretching. Clean the base, dry it fully, and refit the strip with steady pressure along its length.
Can I join two channels into one longer run?
Yes, when the joining parts match the channel model and the feed plan covers the longer run. Align the sections, join the diffusers to match, and test the full run before you mount it.

Share this guide
Tell us what you need
Send Your Project Requirements
Share your contact details and tell us which LED profiles you need.
Explore custom profile options