
How to Specify Recessed LED Aluminum Profiles for Cabinets and Joinery
Plan recessed LED profiles for cabinets: review groove dimensions, strip clearance, diffuser fit, cable entry and sample approval.
On This Page
Quick Answer
To specify a recessed LED aluminum profile, start with the finished installation rather than the outside width of the channel. Confirm the available opening, the profile’s actual section dimensions, the usable space for the LED strip and connectors, the diffuser interface, and the fixing method. Then review cable entry, end access, cutting tolerances and maintenance before approving a sample.
A profile can be suitable for one cabinet detail and unsuitable for another even when both are described as “recessed.” The correct choice depends on the complete assembly and the way the surrounding material is prepared.
Introduction
Recessed linear lighting can make a cabinet, shelf or display look carefully integrated. The aluminum profile sits within a prepared opening, while the diffuser presents a controlled light line at or near the finished surface.
See our guide to LED profiles for kitchen cabinet lighting for kitchen-specific options.
For a furniture manufacturer or lighting brand, however, the visible result is only one part of the purchase decision. A successful order also depends on whether the channel fits the machined opening, the LED strip sits flat, the cable can be connected, and the cover can be installed and serviced after the furniture is assembled.
A small difference between the drawing and the actual assembly can become expensive when repeated across a production batch. An opening that is too narrow may damage the profile or surrounding finish. A connector that does not fit within the channel may require additional machining. An attractive diffuser may be difficult to remove after the profile is enclosed.
This guide provides a practical framework for reviewing those details before you confirm a recessed LED profile order.
01. What Is a Recessed LED Aluminum Profile?
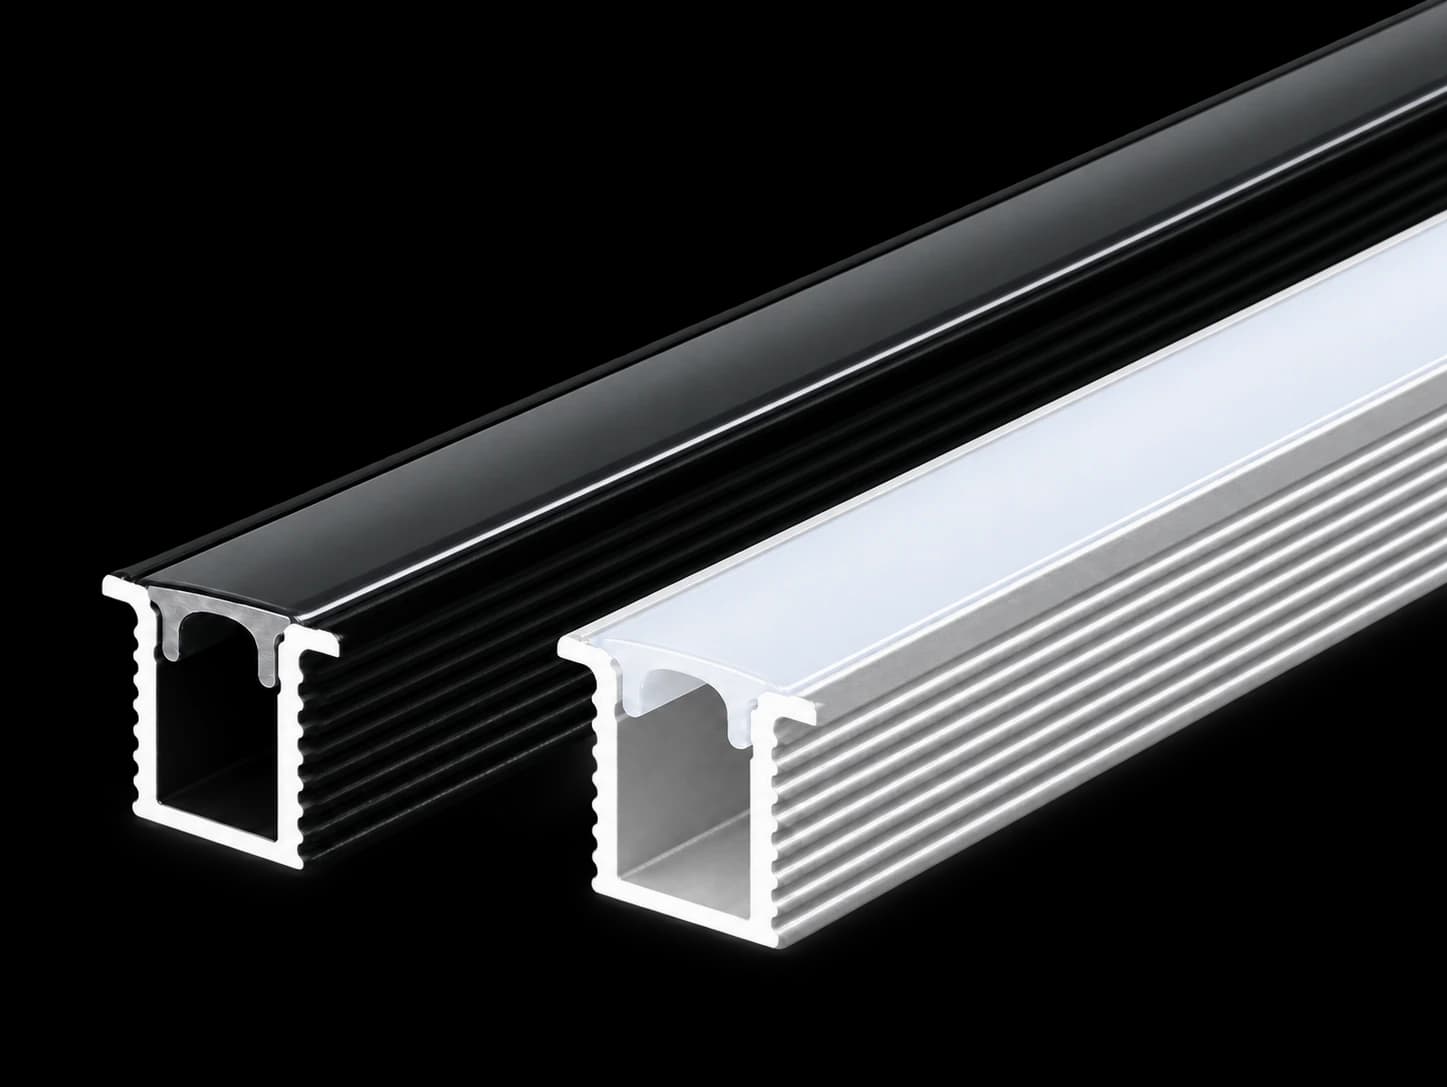
A recessed LED profile is an aluminum section intended to sit partly or largely within an opening in a substrate. Depending on the section, a visible lip may cover the edge of the opening, or the installation may require a different finishing detail.
A typical assembly can include:
- An aluminum profile.
- A compatible diffuser cover.
- End caps.
- A fixing method, such as clips, screws or adhesive where appropriate.
- An LED strip and electrical components selected for the application.
The exact supply scope must be confirmed in the quotation. A profile supplier’s offer does not automatically include an LED strip, driver, controller or finished luminaire assembly.
Recessed Is an Installation Description
“Recessed” does not identify one universal shape. Some profiles are intended for routed cabinetry, others for different building details. The visible edge, profile depth, mounting method and diffuser position vary by model.
If your project requires a trimless plaster finish, review a profile designed for that construction rather than assuming that any cabinet profile can perform the same function. The substrate, finishing method and order of installation may be different.
02. Start with the Finished Cabinet or Joinery Detail
Before comparing catalog images, define where the light line will sit in the finished product.
Ask the designer, furniture manufacturer and installer to agree on:
- The visible position of the illuminated line.
- Whether the diffuser will be flush, slightly recessed or visibly framed.
- The substrate and surface finish.
- The direction from which users will see the light.
- The positions of joints, ends and cable entries.
- Whether the cover or LED strip must be replaceable.
A profile at the back of a cabinet shelf may illuminate the wall behind the objects. A profile near the front may produce a different lighting effect and may be more visible to a person standing below it.
Those decisions affect the section you need. They should be resolved before the opening is released to furniture production.
Review Reflections as Well as Direct Viewing
A profile hidden from direct view can still appear in a glossy countertop, glass shelf or polished panel. If the appearance of the light line is important, include the reflective material in the sample review.
The same LED strip and diffuser can look different from a standing position, a seated position and a close-up view. Define the conditions that matter for the actual product application.
For a more detailed review of visible LED points, see How to Get Dotless LED Strip Lighting.
03. Understand the Dimensions That Matter
The outside width printed beside a catalog picture is not enough to establish the required groove or strip size.
| Dimension or interface | Purchasing question |
|---|---|
| Profile body width | How wide is the part that enters the opening? |
| Visible flange or lip | Does it cover the intended edge without interfering with adjacent details? |
| Profile depth | Is sufficient depth available below the finished surface? |
| Usable strip mounting width | Can the actual strip sit flat inside the profile? |
| Connector and solder clearance | Is additional space needed at the connection point? |
| Diffuser engagement | Can the specified cover be fitted and removed as intended? |
| End-cap position | Does the end cap change the required space or finished length? |
| Fixing arrangement | Does a clip, screw or adhesive layer change the installation envelope? |
These dimensions must come from the selected model and the intended assembly. They should not be estimated from a photograph.
Groove Width Is Not Automatically the Same as Profile Width
The opening must accommodate the selected section and its fixing method. It may also need to account for manufacturing variation in the substrate and the profile.
Do not create a universal clearance by adding an arbitrary amount to the outside width. Ask the profile supplier for the relevant section information and have the furniture manufacturer validate the actual machining arrangement.
A production-ready groove specification should identify:
- The model and profile revision.
- The target opening width and depth.
- The measurement location.
- The tolerance agreed for the substrate.
- The fixing method and installation direction.
- The acceptance method for the sample.
Usable LED Strip Width Needs Its Own Check
A strip’s nominal width may not include every feature that occupies space. Protective coatings, soldered connections and plug-in connectors can increase the space needed at particular points.
Review the actual strip and connector documentation. A strip may fit along the straight run while its connector fails to fit at the end.
Manufacturer guidance likewise distinguishes the internal mounting space from the extrusion’s external dimensions. LED Technologies profile guide
04. Plan the Fixing Method Before Machining
The fixing method affects both assembly speed and future service.
Clips or Mechanical Fixings
Where clips are proposed, confirm that they are compatible with the selected section. Review their position, the space they occupy and whether they remain accessible.
If screws or other fasteners are used, the installer should check the substrate, fastener suitability and any effect on the LED strip mounting surface.
A fixing that sits proud inside the channel may prevent the strip from contacting the intended surface. It may also interfere with the diffuser or an end cap.
Adhesive
An adhesive proposal should identify both surfaces, their preparation, the expected service conditions and the supplier’s application instructions.
A bond that holds a sample at room temperature is not automatically approved for every temperature, cleaning routine or service life. Avoid assuming that any double-sided tape is suitable for both mechanical attachment and thermal transfer.
Press Fit
A press fit depends on the actual section and substrate. Excessive insertion force can damage the surrounding finish or distort the profile. Too little retention may allow the profile to move during use.
Use a representative substrate and production process to assess the fit. If the furniture is made from different board materials, the same machining settings may not give identical results.
05. Include Cable Entry and End Access
Cable entry is easy to overlook because it is often outside the main catalog view.
Mark the proposed entry point on the project drawing. Then ask:
- Does the cable enter through an end cap, the side or the back?
- Is additional machining required?
- Will the connection fit inside the profile?
- Is there enough space to make and inspect the connection?
- Can the cable be protected from sharp edges?
- Will the diffuser still be removable after the furniture is installed?
If the cover slides into the profile from an end, confirm that the finished cabinet leaves enough access for the cover’s installation and replacement. A profile surrounded by fixed panels may require a different fitting sequence or cover interface.
Electrical connections and driver installation should follow the component manufacturers’ instructions and applicable local requirements.
06. Review the Profile, Diffuser and Strip as One Assembly
The profile, cover and strip are often purchased separately, but they should be evaluated together.
A useful sample review includes:
- Fit the actual or representative strip into the proposed profile.
- Check the strip’s contact with the mounting surface.
- Install the proposed connector and cable.
- Fit the diffuser using the intended method.
- Check the end caps and joints.
- Operate the assembly under the planned conditions.
- Observe the light line from the agreed viewing positions.
- Test the intended removal and replacement sequence.
A supplier may be able to provide a profile and cover sample, but the sample’s content, charges and shipping terms should be confirmed for the specific inquiry.
Keep Optical and Thermal Questions Separate
A smooth-looking light line does not prove that the LED strip is operating within its allowed temperature range.
Likewise, a strip that meets a temperature requirement may still show visible points or an unsuitable reflection. Review both outcomes using the actual strip supplier’s guidance.
For the thermal questions to include, see LED Strip Heat Management and Aluminum Channels.
07. Use a Representative Installation Sample
A short profile sample can establish whether the diffuser clips into the section. It cannot answer every question about a completed cabinet.
Where the details matter, prepare a mock-up that includes:
- The intended substrate and finish.
- A representative groove produced by the planned method.
- A useful length of the selected profile.
- The proposed fixing method.
- The actual or representative LED strip and cover.
- A cable entry and at least one finished end.
- A representative reflective surface where relevant.
The purpose is not to create a decorative display. It is to make the purchasing decision reproducible.
Record Observations Clearly
A sample record can distinguish:
- Received: The components arrived.
- Checked: The identified features were examined.
- Accepted: The responsible person approved the defined combination.
- Open: A question remains unresolved.
For example, “cover fitted successfully” is useful only when the record identifies which cover, which profile and which fitting method were used.
08. Plan Cuts, Joints and Finished Lengths
A purchase order should distinguish the length of the aluminum section from the length of the visible illuminated line.
Review:
- The distance between finished cabinet ends.
- The space occupied by end caps.
- Whether adjacent profiles butt together or use an approved connector.
- The cover length and position of cover joints.
- The entry and exit points for cables.
- The effect of mitres or other angled cuts.
- Any allowances specified by the responsible designer or supplier.
Long runs deserve special attention. A short sample may not reveal alignment differences, joint appearance or a cover installation issue that appears only after the furniture is assembled.
Do not assume that the aluminum and diffuser should always be cut to the same length. Confirm the intended end detail and supplier’s recommendations for the selected components.
09. Prepare an Inspection and Packaging Brief
Once the combination is approved, carry the same references into the purchase order.
Your shipment inspection plan can identify:
- Profile model and finish.
- Ordered lengths and quantities.
- Matching diffuser reference and appearance.
- End caps and fixing components.
- Protection for visible surfaces and fitting edges.
- Identification of similar-looking components.
- The agreed sampling and acceptance method.
For long profiles, discuss how packages will support the sections and protect their ends. At receiving, inspect external package condition before unpacking, then reconcile components against the order.
A broader framework is available in Buying LED Aluminum Profiles in Bulk.
10. What to Include in a Recessed Profile Inquiry
A short message can begin the conversation. For a useful technical review, prepare the following as available:
- Cabinet or joinery application.
- Desired finished appearance.
- Proposed profile model or section reference.
- Available opening width and depth.
- Substrate and surface finish.
- LED strip width and connector details.
- Required diffuser appearance.
- Cable entry and end treatment.
- Lengths, quantities and delivery destination.
- Sample, inspection or packaging requirements.
If a dimension has not been finalized, mark it as an open question. A clearly identified unknown is more useful than an assumed value presented as approved.
FAQ
Can I choose a recessed profile from its outside width?
No. The profile’s body, visible lip, depth, internal mounting space and fixing arrangement all need to be reviewed. Use the selected section information and validate a representative opening.
Should the diffuser sit flush with the cabinet surface?
That depends on the intended design and the selected profile. Confirm the relationship between the diffuser, flange and finished substrate before the cabinet opening is machined.
Does a wider profile always fit a wider LED strip?
Not necessarily. External width and usable strip mounting width are different dimensions. Connectors and coatings may also occupy additional space.
Can I replace the diffuser after the cabinet is assembled?
It depends on the cover interface and available access. Check whether the cover clips in from the front or slides in from an end, then review the finished installation sequence.
Is one short sample enough for a long production run?
A short sample is useful for initial fit checks. Longer representative samples may be needed to review alignment, joints, handling and cover installation.
Does the profile determine the complete lighting system’s temperature rating?
No. Operating temperature depends on the strip, profile, mounting interface, surrounding materials and operating conditions. Follow the relevant strip and system documentation.
Conclusion
A recessed LED profile should be specified as part of a finished furniture detail. The most useful purchasing record connects the opening, section, LED strip, cover, cable entry and installation method to one approved sample.
Resolve those interfaces before the furniture is machined and before production quantities are ordered. The result is a clearer quotation and a better basis for repeatable assembly.
Discuss Your Recessed Profile Requirements
Share your name, email, WhatsApp number and a short description of the cabinet or joinery application. Include the profile reference and available dimensions if you already have them.

Share this guide
Tell us what you need
Send Your Project Requirements
Share your contact details and tell us which LED profiles you need.
Explore custom profile options